Usage Guide
This guide will describe the usage of the Metabrowser Utility widget. With this widget you can register your Metasite with our backend and create or delete portals which connects your Metasite with others in the ecosystem.
-
When you open Unreal Editor with Metabrowser plugin added to the project, Metabrowser widget will automatically open. In case you have closed it and wish to open it again, a button with Xsolla logo is provided next to
Platformswhich will reopen it.
Metabrowser Widget login screen

Button which opens Metabrowser Widget
-
Once the widget is open, you will be greeted with a login screen. Input your email address and password and click “Login” to proceed. Keep in mind that you will need to have a registered account with Xsolla beforehand.
-
After the login screen, you will be prompted to select your Metasite from the dropdown list, or if it has not yet been created, create a new one.

Select your Metasite and click Continue to proceed. If this is a new metasite, add it first, it will show up on the dropdown list
-
Once you have selected your Metasite and clicked continue, you will see a Portal Management screen with just one button to initialize your portals.
-
a. Before clicking Initialize portals you need to add portals to your map. In order to do so, drag and drop
BP_MetasitePortalfrom the Content Browser into your map at a location of your choosing. You can add as many portals to the map as you wish. -
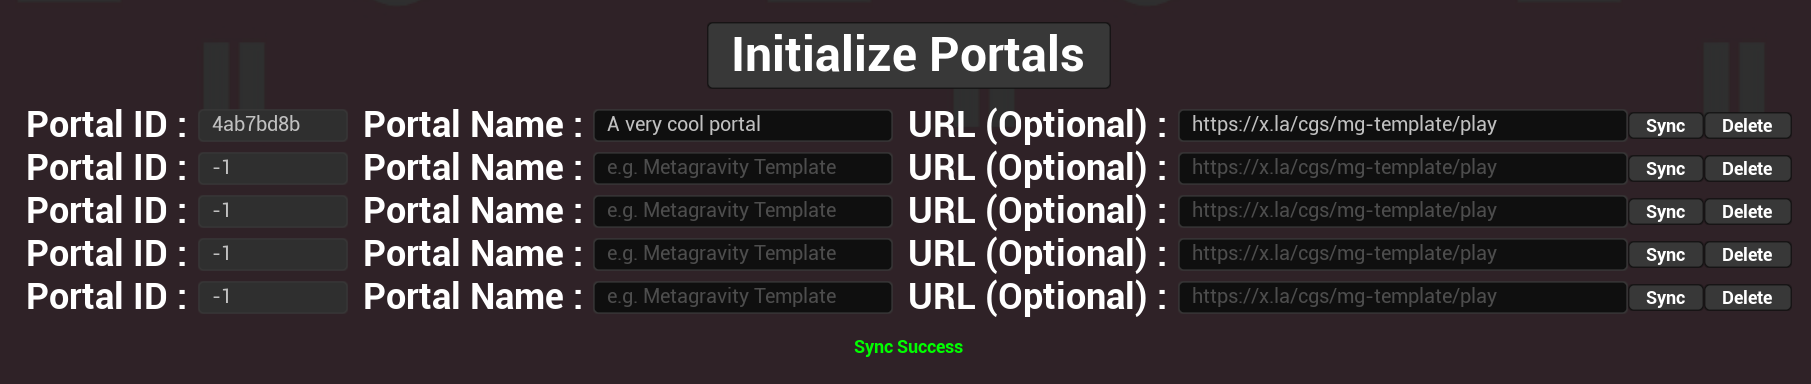
b. Once you have added portals to the map, click “Initialize Portals” button in the widget. This will pick up all portals from the map and show them in a list.
Placing 5 portals in the map and clicking “Initialize portals” produces this screen
-
c. Populate Portal Name and optionally set URL of another Metasite where you want that portal to lead. At this point, Portals don’t have an ID since they are not yet synced with backend. Give a descriptive name to your portals so that you can identify them easily later on, this name will be displayed above the portal in your build.
-
i. NOTE: You will be able to manage your portals through Developer Dashboard, this is only intended to make an initial setup. Developer Dashboard will provide a
-
ii. NOTE: Leaving the URL field empty will make a portal lead to a random Metasite
-
-
d. Once you have added information about the Portal, you need to Sync it with backend, which will assign an ID to it. You can do this by clicking on the Sync button on the right side of the current portal.
-
e. Repeat steps 4.c and 4.b for every portal
-
f. Save your map, this will save portal actors which have been modified by the widget. If you close the engine without saving, it will prompt you to save the portals. Don’t discard these changes, otherwise, you will have to repeat this process.
-
g. NOTE: PortalID will be displayed above portals in your map, so you can identify which portal is which.
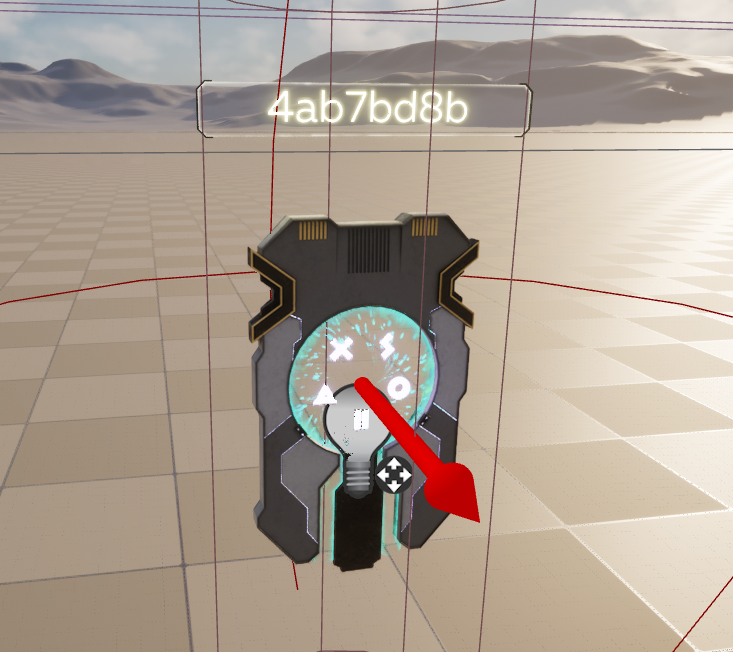
PortalID being displayed above BP_MetasitePortal actor in the level after Sync
After sync. Notice how PortalID has changed

Before sync
-
Done